Your Guide to Effectively Servicing a Sump Pump
Your Guide to Effectively Servicing a Sump Pump
Blog Article
In this article underneath you can discover a bunch of sensible content about Keep Your Sump Pump Clean, It'll Keep You Dry.
Sump pumps are essential components in many homes, particularly in areas vulnerable to flooding or excessive dampness. They aid avoid water damages by effectively getting rid of excess water from basements or crawl spaces. Nevertheless, like any other device, sump pumps call for routine maintenance to ensure they function successfully when required the most. Cleansing your sump pump is an essential part of its upkeep, and recognizing exactly how to do it correctly can save you from expensive fixings and prospective catastrophes.
Introduction
Maintaining a tidy sump pump is essential for its proper performance and longevity. Disregarding this essential task can lead to blockages, malfunctions, and ultimately, water damages to your home. As a result, discovering exactly how to clean a sump pump is essential for property owners who count on these gadgets to keep their cellars dry and safeguarded.
Comprehending the Sump Pump
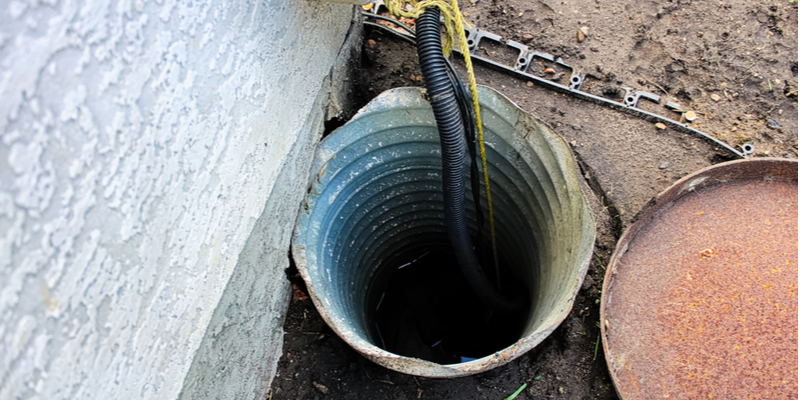
Prior to diving into the cleaning procedure, it's necessary to have a fundamental understanding of exactly how a sump pump functions. Generally mounted in a pit or basin listed below the basement flooring, a sump pump contains several essential components, consisting of a pump, a float button, and a discharge pipe. When water accumulates in the pit, the float button turns on the pump, which after that pumps the water out with the discharge pipeline, far from the structure's structure.
Indicators of a Dirty Sump Pump
Understanding when your sump pump needs cleaning is crucial for protecting against prospective breakdowns. Some usual signs that indicate a dirty sump pump consist of weird sounds throughout procedure, reduced water circulation, and noticeable debris in the pit. If you see any of these signs and symptoms, it's vital to clean your sump pump without delay to stay clear of any further issues.
Preparing for Cleaning
Prior to you start cleansing your sump pump, it's necessary to take some safety and security precautions. Beginning by turning off the power to the pump to stay clear of any kind of electrical mishaps. Furthermore, wear proper safety equipment, such as gloves and goggles, to shield yourself from dirt, particles, and prospective microorganisms.
Step-by-step Guide to Cleaning a Sump Pump
Turning off the Power
Begin by detaching the power supply to the sump pump to prevent any kind of mishaps while cleansing.
Eliminating Particles and Dirt
Use a container or an inside story to eliminate any type of noticeable particles, dirt, or sediment from the sump pit. Dispose of the debris properly to prevent it from clogging the pump or the discharge pipeline.
Cleaning up the Pump and Float Switch Over
When the pit is clear of particles, very carefully remove the pump from the pit. Check the pump and the float switch for any type of indicators of damage or wear. Utilize a soft brush or fabric to clean up the surface areas and remove any kind of gathered gunk.
Flushing the System
After cleaning the pump and float button, flush the sump pit with clean water to get rid of any type of staying dirt or debris. This will help make certain that the pump operates efficiently and effectively.
Checking for Appropriate Performance
Prior to reinstalling the pump, do a fast test to make sure that the float button triggers the pump correctly. Pour some water right into the sump pit and observe the pump's operation. If everything is operating properly, you can rebuild the pump and reconnect the power supply.
Maintenance Tips to Keep Your Sump Pump Clean
Along with periodic cleaning, there are several upkeep tips you can follow to keep your sump pump in ideal problem:
Final thought
Cleaning your sump pump is a critical facet of its upkeep and ensures that it operates successfully when you need it the most. By adhering to the steps detailed in this overview and incorporating regular upkeep into your regimen, you can extend the life-span of your sump pump and secure your home from water damages.
How To Clean a Sump Pump
Prepare The Materials
Plastic sheet or tarp Garden hose Scraping tool (putty knife or plastic scraper) Large bucket Wet/dry vacuum Remove the Sump Pump from the Power Supply
Unplug the sump pump from the power outlet or turn off the circuit breaker. Don’t skip this step, as it is crucial for your safety.
Cut Off Any Water Source
Lock all systems that drain into the sump pit, and inform everyone not to use them. Doing this step will prevent water from flowing into the pit while you’re cleaning.
Wrap the Bottom of the Pump
Place the pump in an area where you can clean it from all sides. Wrap the bottom portion of the sump pump with plastic tarp/sheeting for easier cleanup.
Clean the Pump
Sprinkle water onto the pump using a garden hose to loosen the debris. Ensure to spray all sides and openings. Remove any hard-stuck gunk with a scraping tool.
Rinse the Pump
Splash water again onto the pump using the garden hose. Doing so will flush down any remaining debris and gunk.
Drain the Check Valve
The check valve is a component of the sump pump that helps drain water and prevents it from flowing back. Open the valve and ensure to catch the drained liquid with a bucket.
Remove Excess Water With a Wet/Dry Vacuum
Use a shop vac to remove all the remaining water in the pump. Besides your device, the wet/dry vacuum can also help clear spills in the area where you cleaned the device.

As a serious reader about Steps to Cleaning Your Sump Pump Properly, I was thinking sharing that article post was a good idea. Loved our blog posting? Please quickly share it. Help others discover it. We value your readership.
Book Service Report this page